Showing posts with label pinterest. Show all posts

Thursday, February 20, 2014

Fabric Covered Tin Cans For Organizing

~This was a fun and easy project to complete~


I've been working on my craft room for a year or two years... (See this post if you want to know how it became the craft room, because I am not about to bore you out of your mind!)
On to the project. I made several tin can organizers a couple years ago. I used scrapbook paper to make them and surprisingly they held up better than I thought they would.
Since my craft room is now slash my home office, I have once again began the task of revamping and organizing. I've become a little obsessed with tin cans which behooves my hubby to no end! (at this point he no longer asks what I am creating, he just waits for instructions, LOL)

Supply List:

Fabric of your choice
Tin cans
Hot glue gun
Scissors
Mason jar lid (say what!)
yard stick (OCD optional)
pen (OCD Optional)


Lay out your fabric and cut out a length enough to wrap around the can. 

This is where my OCD kind of takes over. For my own peace of mind I used my yard stick and pin and drew a line out on the fabric so it would be straight.

Can you see the line?

Because the tin cans vary in size I can't tell you what length to cut the fabric, however, I cut the width about 1/4" longer than the can on the bottom and about 1" longer on top. 


Add a vertical bead of hot glue down the can and press the fabric to it.

Wrap the fabric and add another vertical bead of hot glue.


Now run a bead of hot clue on the inside lip of the can and fold over your fabric.

repeat for the bottom of the can
(believe it or not but that sticker stayed intact through a dishwasher cycle!)

I used a mason jar lid to cut out a circle of fabric for the bottom of my cans. It just so happened to work perfectly.
 And again with the hot glue gun put a bead in the center an round the outer edge and press the circle onto the can. I think it makes the project look finished.
There are 2 cans here I used spray paint, twine and flowers. And although you cannot tell in the photos, the colors match perfectly with the owls.

The the twine cans I simply spray painted them, allowed to them to dry wrapped twine around them and then flowers for accent.

I am so excited about this project! I would love to see your tin can projects and know what you think of mine!

Happy Pinteresting,

Mel :D


Sunday, January 26, 2014

4th of July Rag Wreath

This is a super EASY project! It does take a little time to complete, but the results are worth it!  I happened across this burlap rag wreath video, and thought ohhhhh new obsession! 


Disclaimer, I didn't set out to make another 4th of July wreath, I thought I would make the burlap wreath, but when I got to Hancock Fabric and was searching through the clearance rack.... Well, you can take it from there, LOL.  On another side note, I also went to Phoenix Fabric that weekend and rummaged through their scrap bins and picked up a 4th of July print.

All in, this cost almost $11.00 to make, which includes tax. Don't forget you can download apps on your smart phones for Michael's and Hobby Lobby coupons. I picked up the wire wreath form for 40% off, it only cost me $1.79.

Now, that that is out of the way.


Supply list:

Fabric ( I am guestimating but I got about 1-1.5 yards of each fabric)
Wire Wreath Form (Medium)
Sharp Scissors
Yard stick or measuring tape

I love fabric, but I do not know the difference in them, so I can't tell you if it's poplin, cotton blend, rayon etc... What I can tell you is, the white fabric was a little stretchy, the red with the white stars is shinny and not easy to cut, it is very clingy, the stars and stripes is stiff, and the blue with small white stars is; I think, plan ol' cotton fabric.

*The stars and stripes is printed and the red with white stars fabric is printed on both sides. This is something I suggest you find. If all the fabric is only printed on one side, I personally don't think it would have turned out so well.

My circle fabric cutter you see in the above photo didn't work well cutting. You don't need one!

The most time consuming part is cutting the fabric. I cut long 1 inch strips and then cut those down to 9 inch strips. (For all my fellow OCDer's it does not have to be perfectly 1 inch by 9 inch strips. As my eyes were crossing from all the cutting, some are more narrow others are wider!

 
After all the strips were cut, the fun begins. It  didn't take long to tie them on the wire form maybe 1.5 hours.
 
I started at the inner most circle and worked around. I made an assembly line and I went from one fabric to the next.
 
 
When I was ready to start the second row I pushed the first row of fabric toward the center of the wreath form to give myself working room.
 
 
When I finished the 2nd row, I was almost out of white fabric, so I stopped there. I though about going back for more fabric, but the wreath is full and looks great!!!  I'm super happy how it turned out. My next rag wreath will be a Gamecocks wreath.


I thought about adding some ribbon or an initial... Would love to hear what you would do!
 

Saturday, July 13, 2013

Getting Ready for Game Day! GOOOO GAMECOCKS!

I saw this on Pinterest and KNEW I had to try my hand at making it.


Supplies:
  • 5-1x4's
  • Paint- I like Lowe's Valspar Vanilla Steam, I've had a gallon for about 6 months I use on different projects. It is the perfect NOT WHITE, NOT YELLOWISH neutral.
  • Sample paint Madeira Red, I got a sample from Lowe's at Christmas for $2.50, I used it on this project, O' Come Let Us Adore Him. Then while at Lowe's I picked up another sample of it from their Oops paint for $0.50!
  • Electric saw and tape measure to cut the wood down.
  • Electric Drill and screws or a hammer and nails. (A drill is so much easier :-})
  • Paper for your stencil and scissors to cut it out.
  • Paint brushes: Foam and artist brushes
First I cut the wood down to 36" pieces. Screwed in the cross pieces to hold it all together.  I didn't take photos of this process (sorry:}) Here's the after.


To make my stencil I used my PC, scrap paper, and scissors. Open MS Word or what ever word processing program you have, type out your text and enlarge, trace the letter and cut them out. I guesstimated at the size I needed and it worked out:)


Side note: There are TONS of FREE FONTS out there you can get a little side tracked looking for the PERFECT font!


It took me about 30 minutes to copy all the text and cut them out.
 
OK, now paint your base.
 

You can either caulk the seams or leave them alone, I left them. I want my sign to look a little aged and tumbled.


After the paint has dried (of course) lay it all out again, and use a pencil and lightly trace around your letters.
 
Can  you see it???
 
After everything is traced start painting.
 
I have no idea why I started at the bottom....


So, here is my little BIG difference, LOL. I added the Gamecock's logo to the State.


Happy Pinteresting!!!
 
Mel:D

Monday, July 1, 2013

Clothes Pins and the 4th of July

.

I saw several clothes pin wreaths but not one for the 4th. See the wreath I made last year HERE. Anyhoo, I started taking last years wreath out of the closest to put it up again, and got inspired to make a new wreath from clothes pins. It is a very easy project.


You need red, white and blue spay paint, a wire circle, silver paint for the stars, and don't forget the clothes pins. I bought 200 for $4.00, I wasn't sure how many it would take.

This project cost me $8.50, and that's because I didn't have white spray paint on hand, I ran out of blue, and I had to buy clothes pins.

The steps, I had a wire wreath on hand. I picked it up at a yard sale about a year ago for .50. Seriously! Go hit the weekend yard sales people it is a terrific way to get things CHEAP!

This is the ring I picked up

 
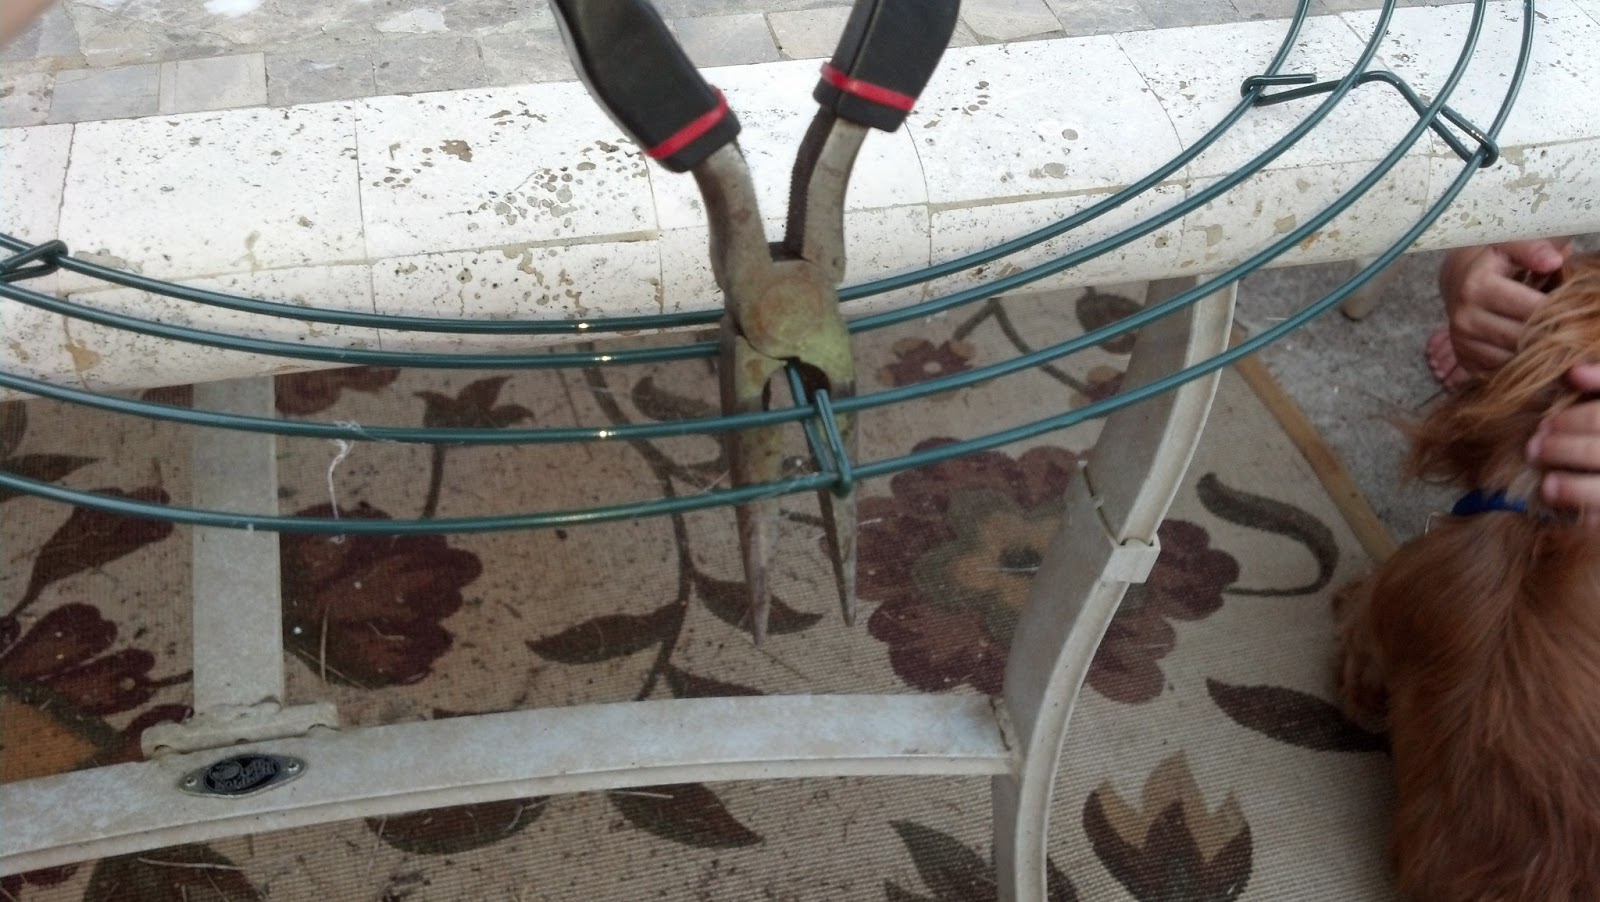
I got a pair of needle nosed pliers and clipped the rings.

 
I ended up with 2 rings, I guess you can say I did this project for $8.25, LOL.
 
 
Take your clothes pins and circle them around the ring. DO NOT PAINT THEM FIRST.
 
 
Mama's little helper :)
 
and
 
124 clothes pins later

 
Let's count by 5's :)
 
You will count out your red and white clothes pins first. I counted groups of 5's and ended up with 40 in each group, and the remainder I painted blue.
 
Get out the spray paint and go to town.  Side note, the red and blue paint covered the raw wood easily, the white however, did not. I bought a cheap $1 can and had to use the entire can.  


I got side tracked watching the paint dry :)

 
After and hour or so the paint was dry.


I started with the blue and then the red and white.
 
alternate 5 red and 5 white.


Before the stars

 
and after :) 

 
I think this project turned out really cute:) would love to hear your thoughts!


After thought: The clothes pins stay on really well, but I think I may hot glue them on after the holiday's.
 
Happy Crafting,
Mel:D