Showing posts with label 4th of July. Show all posts

Sunday, January 26, 2014

4th of July Rag Wreath

This is a super EASY project! It does take a little time to complete, but the results are worth it!  I happened across this burlap rag wreath video, and thought ohhhhh new obsession! 


Disclaimer, I didn't set out to make another 4th of July wreath, I thought I would make the burlap wreath, but when I got to Hancock Fabric and was searching through the clearance rack.... Well, you can take it from there, LOL.  On another side note, I also went to Phoenix Fabric that weekend and rummaged through their scrap bins and picked up a 4th of July print.

All in, this cost almost $11.00 to make, which includes tax. Don't forget you can download apps on your smart phones for Michael's and Hobby Lobby coupons. I picked up the wire wreath form for 40% off, it only cost me $1.79.

Now, that that is out of the way.


Supply list:

Fabric ( I am guestimating but I got about 1-1.5 yards of each fabric)
Wire Wreath Form (Medium)
Sharp Scissors
Yard stick or measuring tape

I love fabric, but I do not know the difference in them, so I can't tell you if it's poplin, cotton blend, rayon etc... What I can tell you is, the white fabric was a little stretchy, the red with the white stars is shinny and not easy to cut, it is very clingy, the stars and stripes is stiff, and the blue with small white stars is; I think, plan ol' cotton fabric.

*The stars and stripes is printed and the red with white stars fabric is printed on both sides. This is something I suggest you find. If all the fabric is only printed on one side, I personally don't think it would have turned out so well.

My circle fabric cutter you see in the above photo didn't work well cutting. You don't need one!

The most time consuming part is cutting the fabric. I cut long 1 inch strips and then cut those down to 9 inch strips. (For all my fellow OCDer's it does not have to be perfectly 1 inch by 9 inch strips. As my eyes were crossing from all the cutting, some are more narrow others are wider!

 
After all the strips were cut, the fun begins. It  didn't take long to tie them on the wire form maybe 1.5 hours.
 
I started at the inner most circle and worked around. I made an assembly line and I went from one fabric to the next.
 
 
When I was ready to start the second row I pushed the first row of fabric toward the center of the wreath form to give myself working room.
 
 
When I finished the 2nd row, I was almost out of white fabric, so I stopped there. I though about going back for more fabric, but the wreath is full and looks great!!!  I'm super happy how it turned out. My next rag wreath will be a Gamecocks wreath.


I thought about adding some ribbon or an initial... Would love to hear what you would do!
 

Monday, July 1, 2013

Clothes Pins and the 4th of July

.

I saw several clothes pin wreaths but not one for the 4th. See the wreath I made last year HERE. Anyhoo, I started taking last years wreath out of the closest to put it up again, and got inspired to make a new wreath from clothes pins. It is a very easy project.


You need red, white and blue spay paint, a wire circle, silver paint for the stars, and don't forget the clothes pins. I bought 200 for $4.00, I wasn't sure how many it would take.

This project cost me $8.50, and that's because I didn't have white spray paint on hand, I ran out of blue, and I had to buy clothes pins.

The steps, I had a wire wreath on hand. I picked it up at a yard sale about a year ago for .50. Seriously! Go hit the weekend yard sales people it is a terrific way to get things CHEAP!

This is the ring I picked up

 
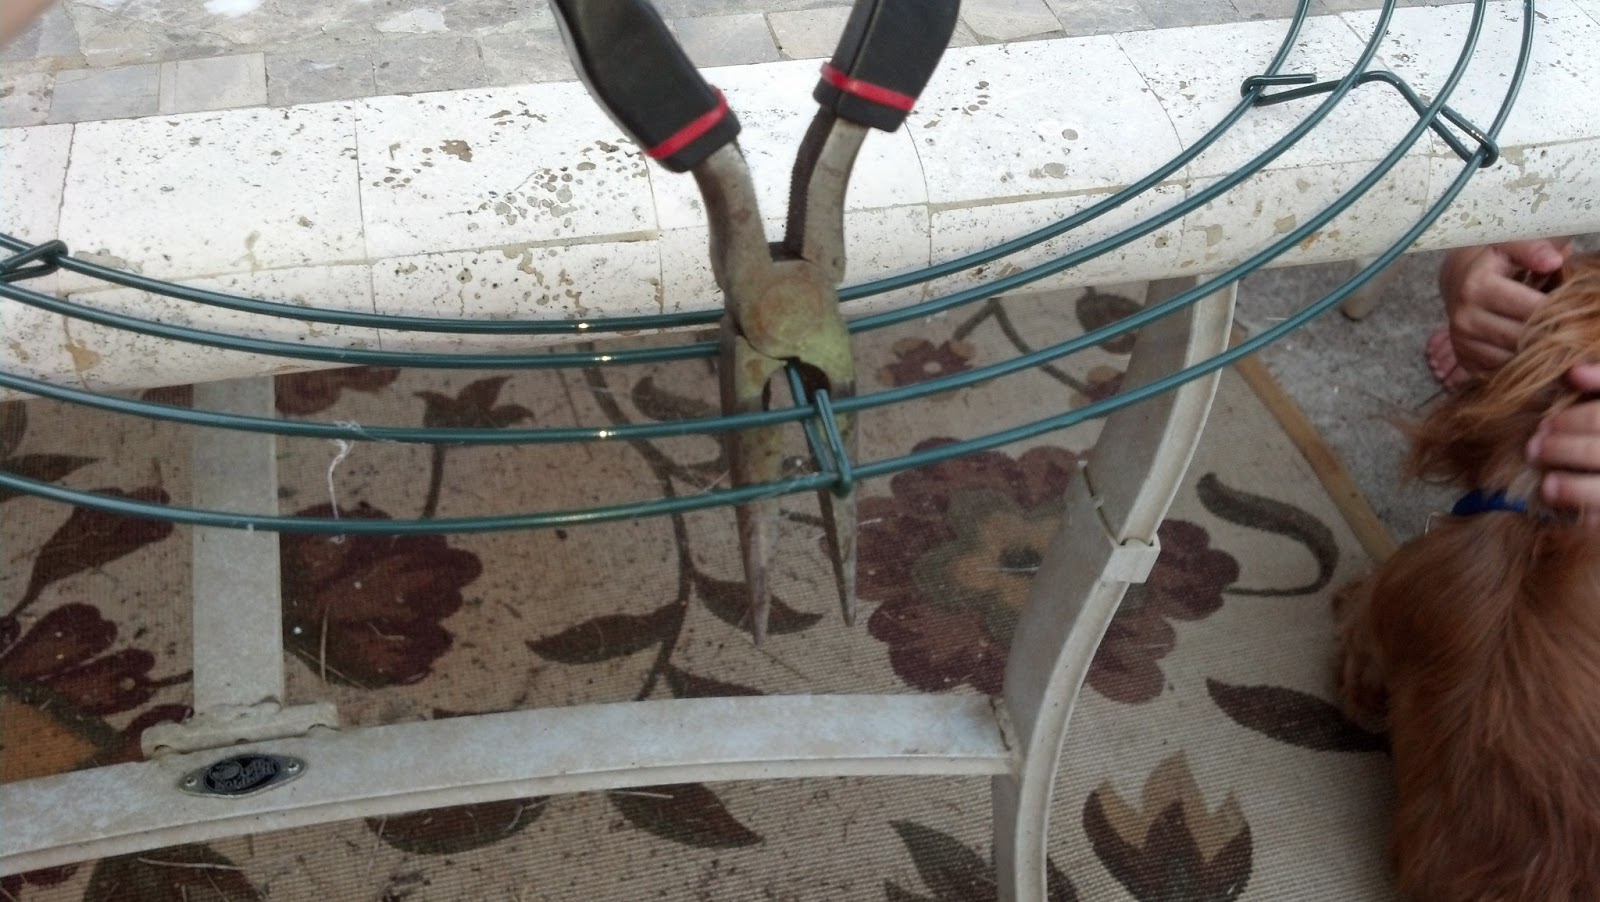
I got a pair of needle nosed pliers and clipped the rings.

 
I ended up with 2 rings, I guess you can say I did this project for $8.25, LOL.
 
 
Take your clothes pins and circle them around the ring. DO NOT PAINT THEM FIRST.
 
 
Mama's little helper :)
 
and
 
124 clothes pins later

 
Let's count by 5's :)
 
You will count out your red and white clothes pins first. I counted groups of 5's and ended up with 40 in each group, and the remainder I painted blue.
 
Get out the spray paint and go to town.  Side note, the red and blue paint covered the raw wood easily, the white however, did not. I bought a cheap $1 can and had to use the entire can.  


I got side tracked watching the paint dry :)

 
After and hour or so the paint was dry.


I started with the blue and then the red and white.
 
alternate 5 red and 5 white.


Before the stars

 
and after :) 

 
I think this project turned out really cute:) would love to hear your thoughts!


After thought: The clothes pins stay on really well, but I think I may hot glue them on after the holiday's.
 
Happy Crafting,
Mel:D


Monday, July 2, 2012

Independence Day Wreath


I found a version of this cute July 4th wreath on Pinterest and followed it to Capital B. She has great insturctions, but if you would like to follow my instructions see below!

First your supply list:
  • 1/2 yard each red, white, and blue felt.
  • Metal clothes hanger
  • 1/2 inch pipe insulator (8 feet from Home Depot or Lowe's)
  • Felt stars
  • Wire
  • Straight pins
  • Hot glue
  • Fat pen or crayon (anything 1/4 to 1/2" to wrap the wire around)
  • Duct Tape
This project is easy and a fun to do while watching movies! It will take you some time to complete it is not a long hour project, but simple, simple, simple!

First, cut up your felt. I cut mine 2.5 x 2.5 and 3 x 3 squares. They are not perfect but close enough in size, but give a neat look with the small size difference. I do not know how many I cut, but I cut, and cut, and cut some more! There is another stack behind what you see.


Next, get you straight pins and hot glue out. Put a small dot of glue in the center of the felt square, stick your pin thru the hot glue, and then push the felt upward. This is the longest part of the entire project!
You should end up with this:


This is what I ended up with! (If you like the box they are in see my Staples Box Project!)


I choose to make my wreath rings because it's so much cheaper.  There is a must know to using the pipe insulator. Hot glue melts the insulator use a low heat glue gun or if you have high heat glue gun just hold to insulator pipe for about 10 seconds so it sticks.

To make your ring. First take your wire hanger and stretch out. Then run thru the pop insulator, pretty easy huh!! Once you have the wire thru the insulator feel for the end of the wire hanger. take your scissors and snip just above the wire.


Then circle it around bring the ends of the wire hanger together.  I bend the ends around each other to hold it together and then duct tape the seam.


Shape into circle.  Check out my Valentine's Day Wreath! I shaped into a heart!


Now the fun part! I started and ended with the same color red for the stripes. I tried to keep my widths about the same for the alternating red and white "stripes."

Taking your hot glue gun and one of the "florettes" (for lack of a better word) insert the straight pin into the end of the gun just to get a little glue and then stick into the ring. This is the quickest part of the whole project it only took me about 45 minutes to work my way round!


Work your way around the wreath until until you get to the blue and then fill it in.


Now the stars.

Take your wire and cut it about 8-12 inches (you'll adjust it as needed) lengths and wrap around your marker or crayon and you will end up with this.


Take one of your felt stars add a little hot glue to the back of the star and then place the wire on top of the glue. Adjust the wire length to your preference making it your own!  I put a couple of wires without the stars and I am so happy how this turned out! You should you end up with this.


I would love to know what you think!


Mel :D