Saturday, July 13, 2013

Getting Ready for Game Day! GOOOO GAMECOCKS!

I saw this on Pinterest and KNEW I had to try my hand at making it.


Supplies:
  • 5-1x4's
  • Paint- I like Lowe's Valspar Vanilla Steam, I've had a gallon for about 6 months I use on different projects. It is the perfect NOT WHITE, NOT YELLOWISH neutral.
  • Sample paint Madeira Red, I got a sample from Lowe's at Christmas for $2.50, I used it on this project, O' Come Let Us Adore Him. Then while at Lowe's I picked up another sample of it from their Oops paint for $0.50!
  • Electric saw and tape measure to cut the wood down.
  • Electric Drill and screws or a hammer and nails. (A drill is so much easier :-})
  • Paper for your stencil and scissors to cut it out.
  • Paint brushes: Foam and artist brushes
First I cut the wood down to 36" pieces. Screwed in the cross pieces to hold it all together.  I didn't take photos of this process (sorry:}) Here's the after.


To make my stencil I used my PC, scrap paper, and scissors. Open MS Word or what ever word processing program you have, type out your text and enlarge, trace the letter and cut them out. I guesstimated at the size I needed and it worked out:)


Side note: There are TONS of FREE FONTS out there you can get a little side tracked looking for the PERFECT font!


It took me about 30 minutes to copy all the text and cut them out.
 
OK, now paint your base.
 

You can either caulk the seams or leave them alone, I left them. I want my sign to look a little aged and tumbled.


After the paint has dried (of course) lay it all out again, and use a pencil and lightly trace around your letters.
 
Can  you see it???
 
After everything is traced start painting.
 
I have no idea why I started at the bottom....


So, here is my little BIG difference, LOL. I added the Gamecock's logo to the State.


Happy Pinteresting!!!
 
Mel:D

Monday, July 1, 2013

Clothes Pins and the 4th of July

.

I saw several clothes pin wreaths but not one for the 4th. See the wreath I made last year HERE. Anyhoo, I started taking last years wreath out of the closest to put it up again, and got inspired to make a new wreath from clothes pins. It is a very easy project.


You need red, white and blue spay paint, a wire circle, silver paint for the stars, and don't forget the clothes pins. I bought 200 for $4.00, I wasn't sure how many it would take.

This project cost me $8.50, and that's because I didn't have white spray paint on hand, I ran out of blue, and I had to buy clothes pins.

The steps, I had a wire wreath on hand. I picked it up at a yard sale about a year ago for .50. Seriously! Go hit the weekend yard sales people it is a terrific way to get things CHEAP!

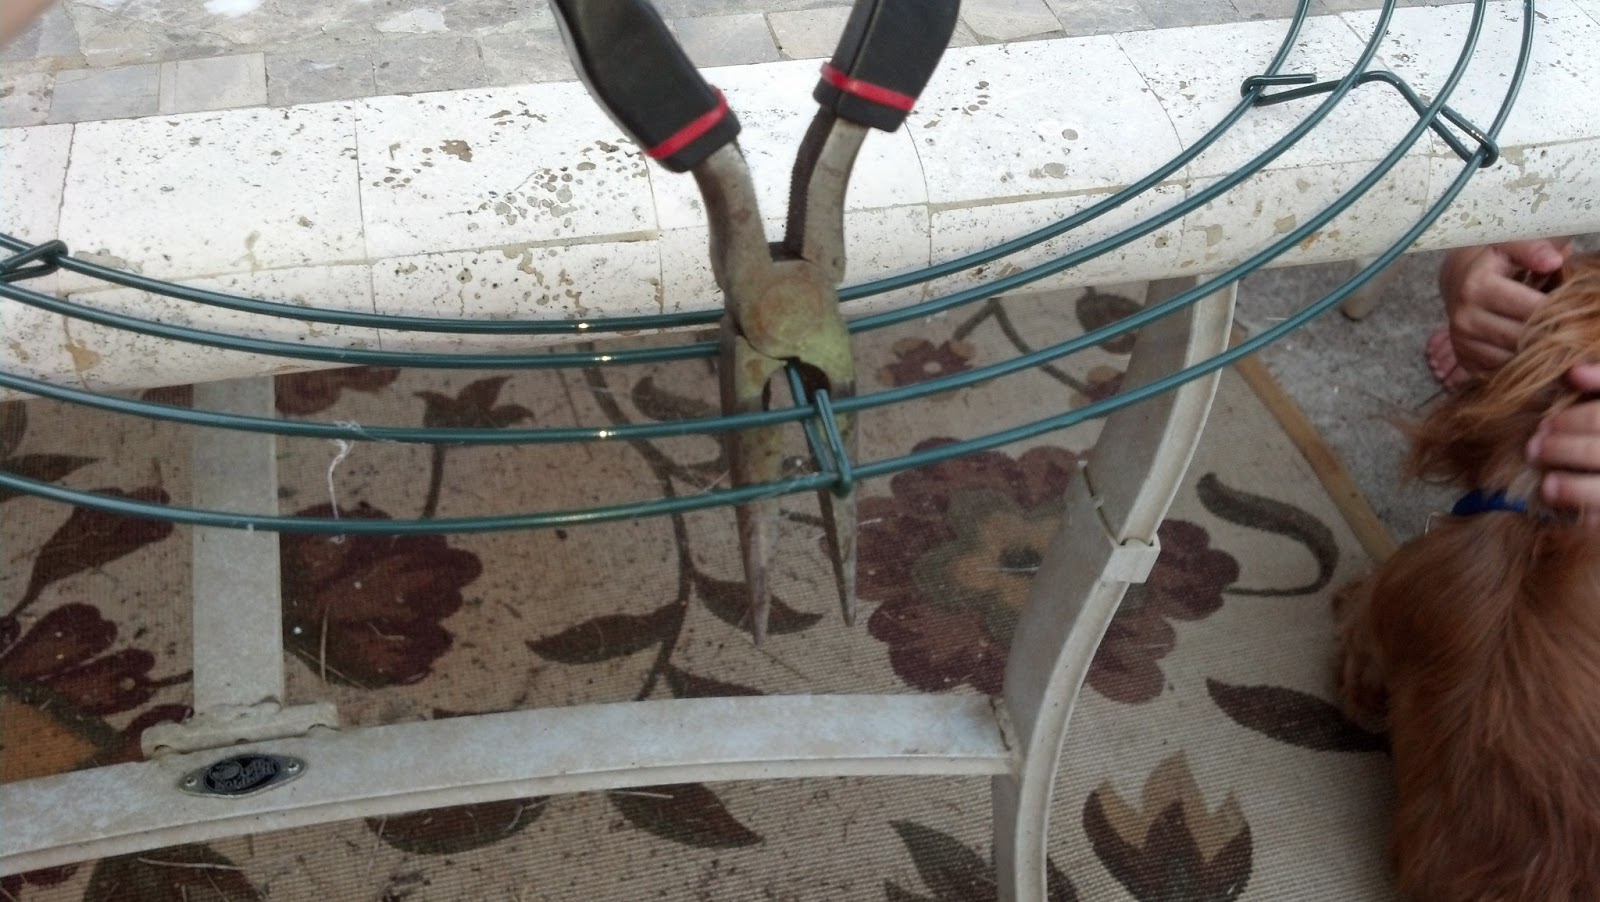
This is the ring I picked up

 
I got a pair of needle nosed pliers and clipped the rings.

 
I ended up with 2 rings, I guess you can say I did this project for $8.25, LOL.
 
 
Take your clothes pins and circle them around the ring. DO NOT PAINT THEM FIRST.
 
 
Mama's little helper :)
 
and
 
124 clothes pins later

 
Let's count by 5's :)
 
You will count out your red and white clothes pins first. I counted groups of 5's and ended up with 40 in each group, and the remainder I painted blue.
 
Get out the spray paint and go to town.  Side note, the red and blue paint covered the raw wood easily, the white however, did not. I bought a cheap $1 can and had to use the entire can.  


I got side tracked watching the paint dry :)

 
After and hour or so the paint was dry.


I started with the blue and then the red and white.
 
alternate 5 red and 5 white.


Before the stars

 
and after :) 

 
I think this project turned out really cute:) would love to hear your thoughts!


After thought: The clothes pins stay on really well, but I think I may hot glue them on after the holiday's.
 
Happy Crafting,
Mel:D


Monday, March 25, 2013

Recycle or Upcycle Old Cabinet with Hutch

I love painted furniture. I mean love, love, love... See my Mac and Cheese upcycled TV Console. I spent more money on this hutch than necessary. I bought it off a friend and didn't negotiate on price :(


This piece is actually uglier in person it's more orange (boo Clemson).


The after looks sooooo much better, don't you think?!
 
 
Tip: I find it best to not be in a hurry when painting furniture, you want as smooth as possible finish and hurrying thru just doesn't work. Let the paint dry completely between finishes.
 
Supplies:
  1. Foam Brushes
  2. Foam Rollers
  3. Paint Liner
  4. Screw Driver
  5. Paint: I used Lowe's Vanilla Steam semi-gloss exterior (OK, I know it looks white in the above photo, but it's far from it. Vanilla Steam is the perfect neutral)
  6. Stencil of your choice
  7. Primer: I like to use Zinsser, it's a no sand - sticks to anything primer.
  8. Drop Cloth
  9. 2 2x4's or 4 brick (something to keep the hutch off the floor while painting.)
 
 
Tip: Make sure to set the area up before you start your project. (I'm a little OCD)
 
 
First,  I set up my work area
 
Then, put down the 2x4
 
 
Next, I removed the drawers, hardware and doors (above photo is before the removal)
 
 
Now that the area has been setup I do the prep work.
 
First, Cleaning the hutch
 
I use this wonder product from Lowe's to clean , it keeps from having to sand, it's called TSP.

 
Get ready for the dirt and grime to be removed, have plenty of warm water handy to wash out the dirty cloth. It is very important to let the wood dry out completely before you begin the next step, priming the wood. 
 
Now,
 
Prime: I cannot stress enough to take your time. Make sure your primer stays fresh and your foam roller clean. (I've mentioned before I'm a little OCD). This will actually go a lot quicker than you think. I used 2 coats of primer. The first coat goes slower than the second.
 
 
The foam roller worked well for most of the painting, but you will need your FOAM brush to get the corners, lip etc.
 
First Coat Primer Bottom Cabinet

 
Second Coat Primer Top Cabinet
 
Now that the pieces are primed and have dried thoroughly you are ready to paint.
 
I know I took photos of this process, but the only one I can find is this one below of the 2nd coat of Vanilla Steam.
 
 
The hardware,
 
I used the original hinges, drawer pulls and bottom cabinet knobs.
 
HOWEVER, I did change the look of the the hinges
 
I have spray paint on hand (I have lots of paint on hand) Hammered Bronze
 
 
I changed the knobs on the hutch to glass. These babies were on clearance at Lowe's for .75 cents! I picked up all they had left about a year ago hoping for a project:)


I did forget to take photos of the stencil process...
 
The bottom of this hutch has 2 raised panels, I found this cute bird on clearance 4 or 5 months ago. Of course I picked up hoping for a future use.  I guess I found it!
 
 
I centered the stencil on the raised panel and painted away. (FYI, this is the first time I've every used a stencil)
 
and VOILA!!!


I filled with only a few thing, pieces of my Great Grandmother's China


A photo of my Grandma (I think I look like her)

 
Her picnic basket on top


I would love to see your projects!

mel:D


Saturday, March 23, 2013

Homemade Laundry Soap

I know I am in a very unique situation here... How is making laundry soap unique? Well, it's not, but I don't do laundry... Yep, you read that correctly I DON'T DO LAUNDRY. My wonderful hubby is the laundry guru in our house.  My BFF groans every time we talk about it, LOL;)

When I found the recipe for laundry soap about a year ago, he wasn't gung-ho about trying it, so I let the matter drop (you believe that right!?). In between taking photos of houses today (I'm a REALTOR) I stopped by Wal-mart to pick up soap for the dishwasher. I just so happened to see BORAX, the heavens parted and angels started singing. The wonders of having a Droid Razar and the Pinterest App on my phone I found the recipe on my phone in seconds. You can see the original here. The recipe is for a small amount at a time, "Ain't Nobody Got Time for That" So, in true form I improvised.

Ok, enough of the story you really wanna know about the soap, right?!

FYT, I found everything I needed at Wal-Mart in the isle with mops (I remember seeing mops).


1 Box of Borax
1 Box Arm & Hammer Super Washing Soap
3 Bars of Fels-Naptha
 
You will need
 
A bowl
Cheese grater
Blender
 
Step 1:
 
Shred the 3 Fels-Naptha Bars
 
 
2nd
 
Get the blender out
Take a handful of the shredded Fels-Naptha
Add some Borax
Pulse/Blend
 
 
I just kept adding the shredded Fels-Naptha
 
(It works best to make this in small batches at a time)

 
Dumped the shredded mix it into a bowl
 
 
3rd
 
Dump the Borax, Arm & Hammer Super Washing Soap and the bowl of pulsed up Fels-Naptha into a container with a top. 

 
We are using 2 TABLESPOONS PER LOAD
 
Other's have said 2 tsp per load, but the hubby says it just isn't enough


I'll update this page every once and a while and let you know how many loads we got out of this batch. I've read from 100 to 256 and it lasts a year or longer!!! WOW, that would be awesome!!!
 
I've gotta make this container a little cuter;)