Friday, October 4, 2013

Halloween Take Over!

I'm having a ball this Halloween with the décor! I don't know if I'm doing it for by sweet boy or if it is for me, LOL.


The Witches Brew


SPIDERS!!


Happy Halloween Table Runner


 Hurricane Lamp with a grapevine wreath wrapped in fall leaves.


Scary black bats!


 Lots of Jack-O-Lanterns


Tuesday, September 24, 2013

Autism Football Behavior Chart!

This is one of the most awesome ideas for a behavior chart. My son is autistic and we are always looking for ways to help with his behavior. He is also ADHD, OCD, sensory processing and the list goes on. 

Anyway, he has ABA therapy through the week and our wonderful therapist came up with the idea of a football behavior chart. Side note, he is obsessed with football, he wears a different jersey everyday! LOL


He starts in the End Zone on the left and each time he meets one of his goals he moves 10 yards! If he doesn't do what he is suppose to do he moves 10 yards back. When he gets a touchdown he gets to choose his reward.

His favorite football player is former Gamecock, Marcus Lattimore and current 49er! He loves to move Marcus and get the touchdown! 

Would love to hear your comments and if you have a great way to help manage behavior I would love to know!

Mel:D

Sunday, September 22, 2013

Halloween Wreath for Grandma Fread :)


I know I have been MIA from my site, but it is not without warrant. I do currently have several unfinished projects going on ;}  My Hubby's family will be coming for Thanksgiving this year (they live in Missouri and Kansas) which means big projects around the house!  Poor, poor Hubs!

Now that you know that useless bit of information... I got a text from my Aunt asking me to make a Halloween wreath for my grandparents they're 91!!! 

You know most of my projects I do on the cheap, but it's my g'parents and I want to do it up right! I get my handy dandy smart phone, hit up Michael's and Hobby Lobby with my in store coupons, and still come out pretty good.

I hit there Halloween decor and starting picking up stuff at random with no real thought about how it would end up.

I did make sure I had the black, purple, orange and green deco mesh, black ribbon and a circle foam.

I covered the circle foam in the black ribbon, took the deco mesh (I use floral pins and hot glue to hold in place) and worked my way round the circle. Once this was completed it's just a matter of putting everything in place.

I took my larger items the WELCOME sign, owl, witches hat, BOO!, large spider, large pumpkin and the squiggles (for lack of a better word) and placed them around. I always go back and forth, moving, adjusting, and arranging everything. I also like to let it hang up on the door so I can see how it will lay.


Once I have the bigger items like I want them, I hot glue and pin them in place. After this I place the small green and black spiders around, green, purple, and black glass balls, small squiggles, etc.

This project at most took an hour, more like 35-45 minutes.

Let me know your thought!! I would love to see your projects too.

Happy Halloween!
Mel :D

Saturday, July 13, 2013

Getting Ready for Game Day! GOOOO GAMECOCKS!

I saw this on Pinterest and KNEW I had to try my hand at making it.


Supplies:
  • 5-1x4's
  • Paint- I like Lowe's Valspar Vanilla Steam, I've had a gallon for about 6 months I use on different projects. It is the perfect NOT WHITE, NOT YELLOWISH neutral.
  • Sample paint Madeira Red, I got a sample from Lowe's at Christmas for $2.50, I used it on this project, O' Come Let Us Adore Him. Then while at Lowe's I picked up another sample of it from their Oops paint for $0.50!
  • Electric saw and tape measure to cut the wood down.
  • Electric Drill and screws or a hammer and nails. (A drill is so much easier :-})
  • Paper for your stencil and scissors to cut it out.
  • Paint brushes: Foam and artist brushes
First I cut the wood down to 36" pieces. Screwed in the cross pieces to hold it all together.  I didn't take photos of this process (sorry:}) Here's the after.


To make my stencil I used my PC, scrap paper, and scissors. Open MS Word or what ever word processing program you have, type out your text and enlarge, trace the letter and cut them out. I guesstimated at the size I needed and it worked out:)


Side note: There are TONS of FREE FONTS out there you can get a little side tracked looking for the PERFECT font!


It took me about 30 minutes to copy all the text and cut them out.
 
OK, now paint your base.
 

You can either caulk the seams or leave them alone, I left them. I want my sign to look a little aged and tumbled.


After the paint has dried (of course) lay it all out again, and use a pencil and lightly trace around your letters.
 
Can  you see it???
 
After everything is traced start painting.
 
I have no idea why I started at the bottom....


So, here is my little BIG difference, LOL. I added the Gamecock's logo to the State.


Happy Pinteresting!!!
 
Mel:D

Monday, July 1, 2013

Clothes Pins and the 4th of July

.

I saw several clothes pin wreaths but not one for the 4th. See the wreath I made last year HERE. Anyhoo, I started taking last years wreath out of the closest to put it up again, and got inspired to make a new wreath from clothes pins. It is a very easy project.


You need red, white and blue spay paint, a wire circle, silver paint for the stars, and don't forget the clothes pins. I bought 200 for $4.00, I wasn't sure how many it would take.

This project cost me $8.50, and that's because I didn't have white spray paint on hand, I ran out of blue, and I had to buy clothes pins.

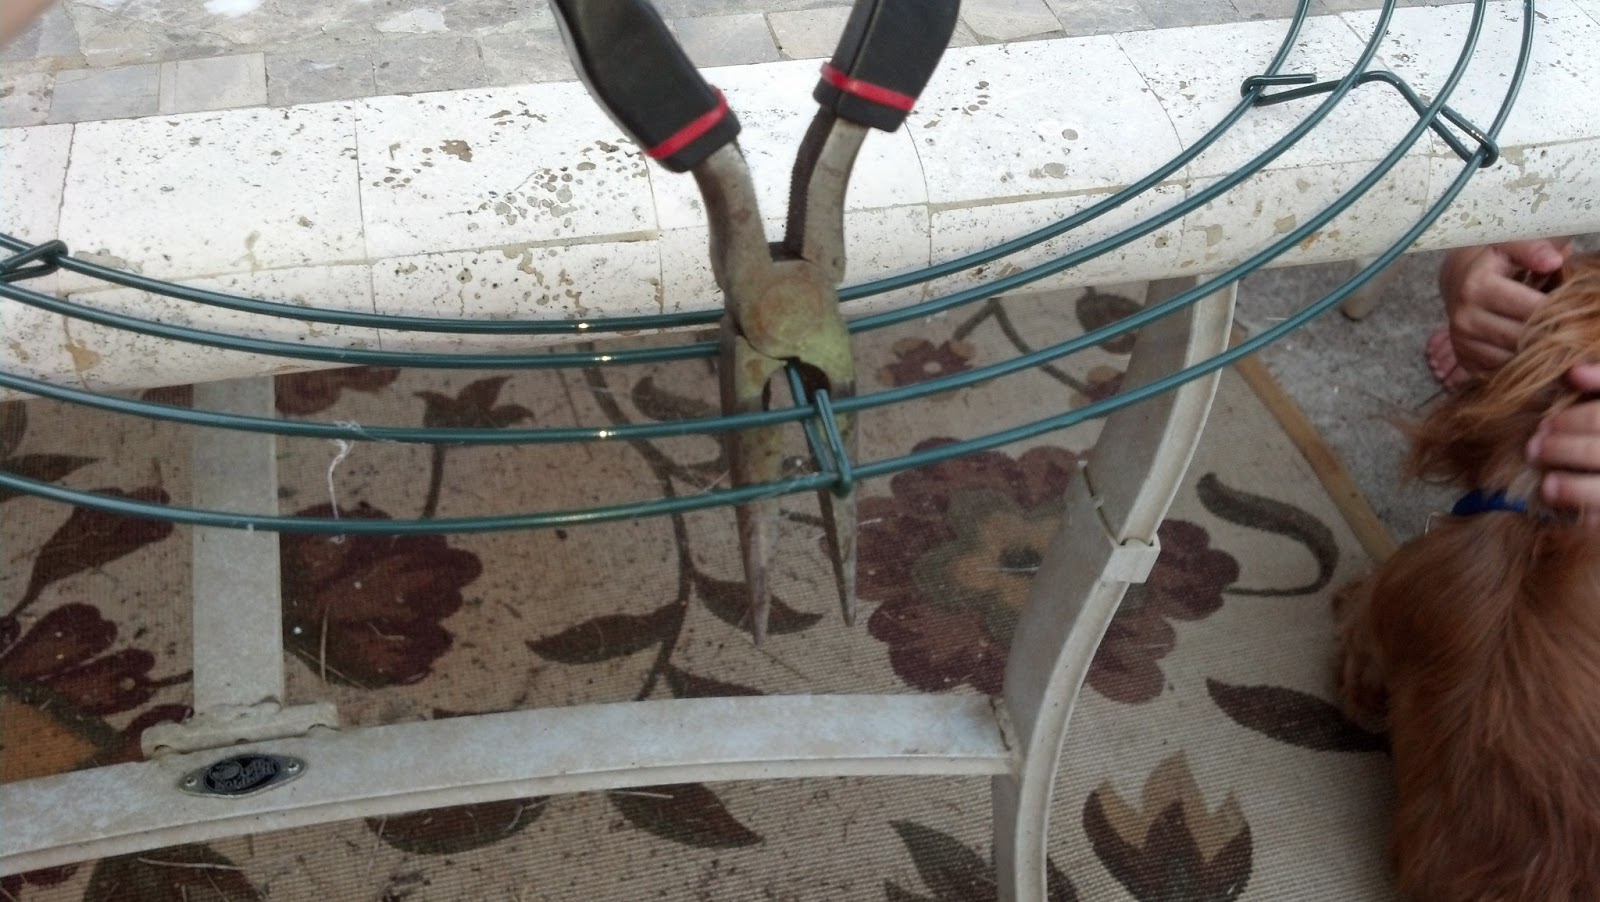
The steps, I had a wire wreath on hand. I picked it up at a yard sale about a year ago for .50. Seriously! Go hit the weekend yard sales people it is a terrific way to get things CHEAP!

This is the ring I picked up

 
I got a pair of needle nosed pliers and clipped the rings.

 
I ended up with 2 rings, I guess you can say I did this project for $8.25, LOL.
 
 
Take your clothes pins and circle them around the ring. DO NOT PAINT THEM FIRST.
 
 
Mama's little helper :)
 
and
 
124 clothes pins later

 
Let's count by 5's :)
 
You will count out your red and white clothes pins first. I counted groups of 5's and ended up with 40 in each group, and the remainder I painted blue.
 
Get out the spray paint and go to town.  Side note, the red and blue paint covered the raw wood easily, the white however, did not. I bought a cheap $1 can and had to use the entire can.  


I got side tracked watching the paint dry :)

 
After and hour or so the paint was dry.


I started with the blue and then the red and white.
 
alternate 5 red and 5 white.


Before the stars

 
and after :) 

 
I think this project turned out really cute:) would love to hear your thoughts!


After thought: The clothes pins stay on really well, but I think I may hot glue them on after the holiday's.
 
Happy Crafting,
Mel:D