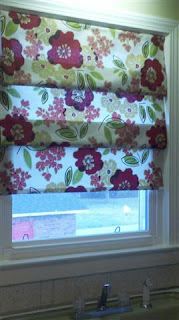
Before
After
The in between!
Let me reiterate I do not sew and it's not because I don't want too. I would love to quilt, sew curtains and drapes, but that gene skipped a generation. I even have a sewing machine collecting dust!!
So, I figured my away around it for this project and it involved glue!
Supply List:
- Tape measure
- Hot glue gun
- Tacky glue
- Iron
- Pencil
- Fabric
- 3 tension rods
Let me say, this is the first time I attempted this and it will NOT be the last! I'm just ubber excited it turned out as well as it did!
Let's get started!
Measure your window you don't want to go smaller than that. My window happens to be 31x36, cut your fabric bigger than the window. I cut mine 33x48 no particular reason it just worked out that way.
Plug in the iron and fold the sides over.
 Helpful tip: If your fabric has a pattern or top and bottom, make sure you cut it the correct way. I actually wrote the word bottom on the fabric in pencil :)
On the left and right side I folded over 1" and then ironed it down
On the top I folded over 2" and the bottom 2" so my curtain ended up being 31x44. It looked like this.
Take your Tacky Glue and glue the sides and bottom. You don't need a ton of glue and depending on the fabric it might bleed thru, so be careful.
For the top where the rod is going to be I used hot glue. I figure this is going to be a little stronger than Tacky Glue.
After this I ran the tension rod thru the top and took it to the window. Place your next tension rod over the fabric and then bring it up and over. Repeat with the 3rd tension rod.
I would love to know what you think or if you tried and what tips you could offer me! I have 2 windows in my basement to do next!
.jpg)
.jpg)
.jpg)
.jpg)
.jpg)
No comments:
Post a Comment